eOffice – How to use File Migration
File Migration is the process of converting the old physical files into electronic files which can be processed in eOffice application. To Migrate a file the user can perform the following steps.
Follow Step 1 if doing file migration the first time, else follow Step 2.
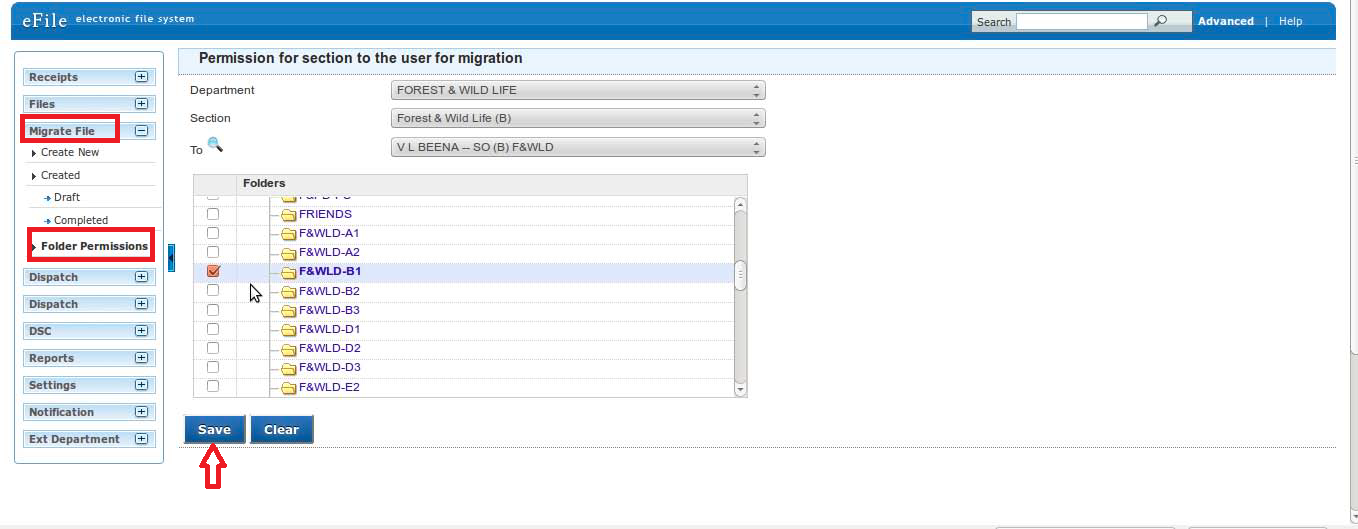
1. Click on ‘Folder Permission‘ under ‘Migrate File‘ option in the eOffice main menu to set folder permission to the user in the Document server of the eFile application to access the concerned old physical files which are scanned and stored in the server. Click on the ‘Save‘ Button after choosing the department, section, name, and file folder from the drop-down list. After setting the folder permission (one-time process), perform the following steps.
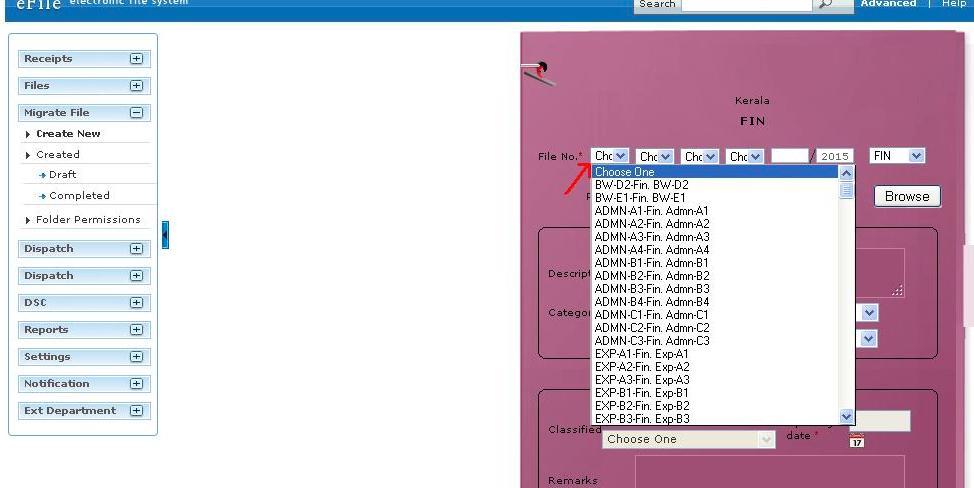
2. Select ‘Create New‘ option in ‘Migrate File‘ menu. Choose your seat number in the ‘File Number’ option.
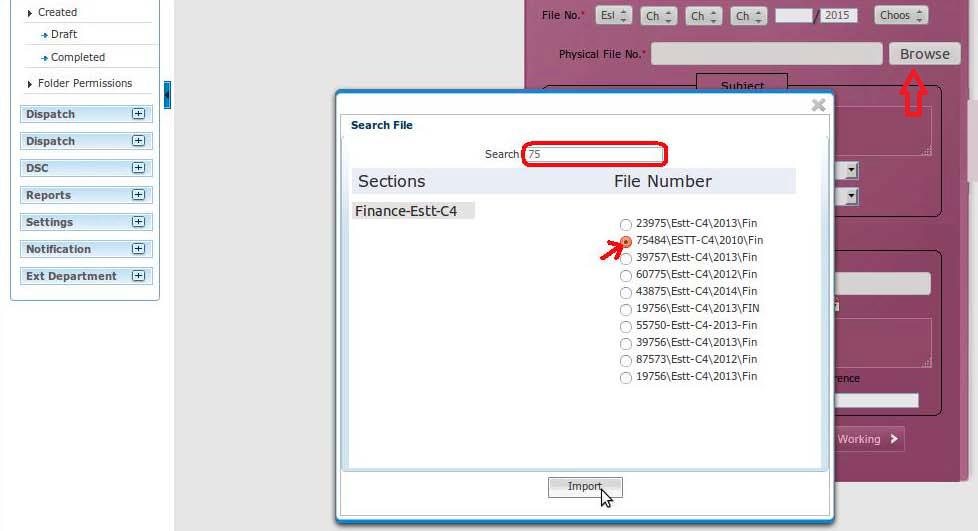
3. Click the ‘Browse‘ button to select the file for migration. Select the file from the list which is to be migrated. You can use the file search facility to search the file by providing the Physical file number in the ‘Search‘ box. Then click the ‘Import‘ button.
A new panel will appear on the left side showing ‘source’ on the upper side and ‘Destination’ on the lower side. Now we’ve to transfer the scanned documents from the source (Server) side to the Destination (efile) side.
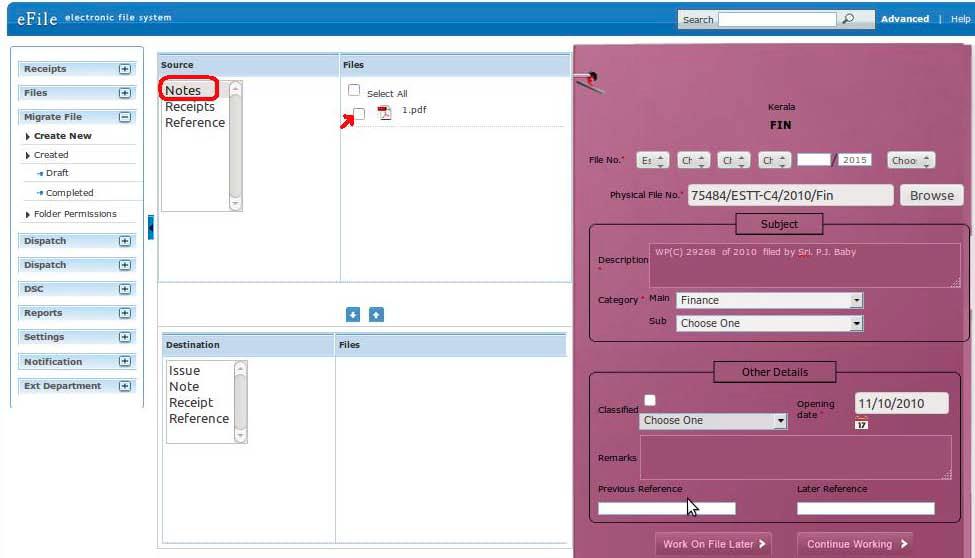
4. Click on the Notes folder in the Source Side and select all the scanned files. Click the ‘Notes’ folder in Destination side and click the Down arrow Symbol in the middle. Continue these steps for all the ‘Receipts’, ‘Issues’ and ‘References’ if any. Now enter the details of the file like ‘Description’, ‘Category’ and ‘Opening Date’. Then click the ‘Continue Working’ button. As a result the following window appears.
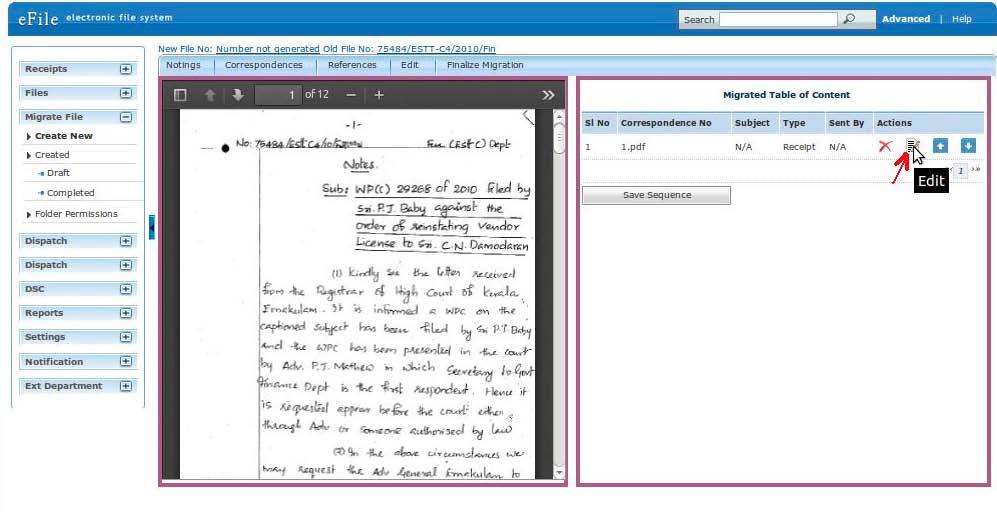
5. Enter the metadata for the receipt and issues (Mandatory Fields should be filled) by clicking the ‘Edit’ icon corresponding to it as shown.
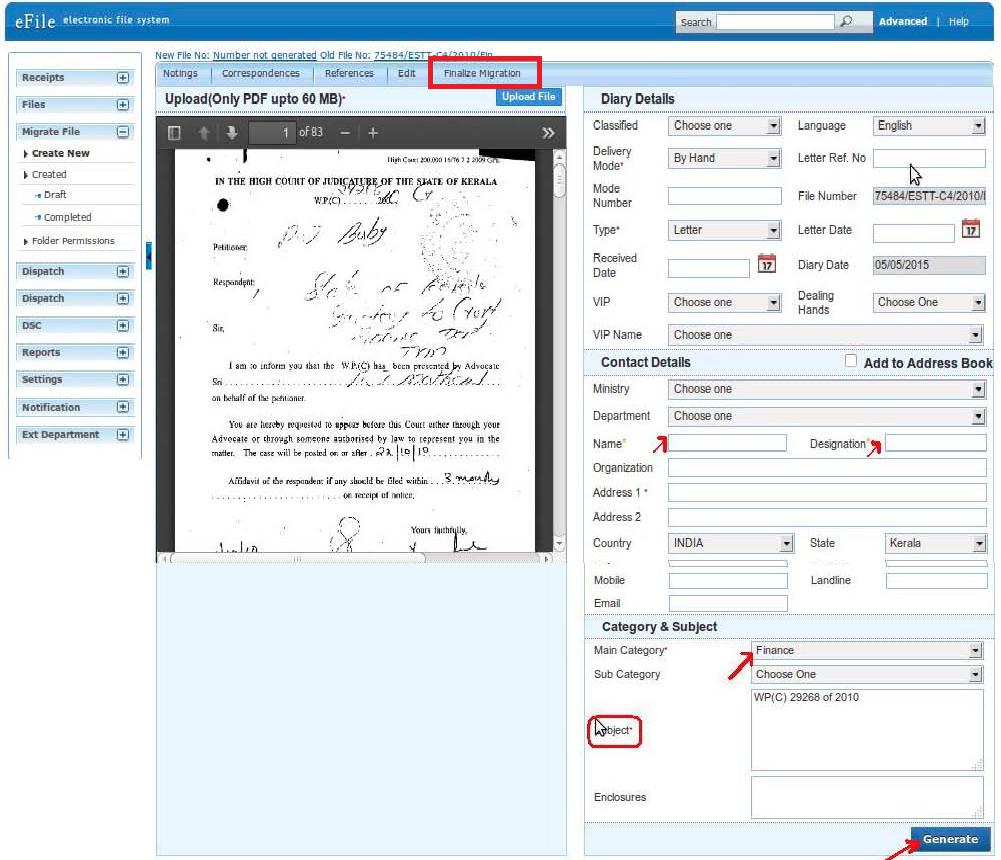
6. After filling the Meta data, click the ‘Generate‘ button. After generating the receipts and issues click the ‘Finalize migration‘ option.
7. Click the ‘OK‘ button in the confirmation box that appears. The migrated file is created and the Migrated Notes will be shown as a link on the Noting side and the receipts will be shown on the correspondence side.
📢 Stay Updated with GConnect
Join our Whatsapp channels for the latest news and job updates:
Join GConnect News Join GConnect Jobs
GConnect News

GConnect Jobs