eOffice – DSC (Digital Signature Certificate)
Introduction
A Digital Signature Certificate has the same legal recognition and validity as handwritten signatures which implies a process of demonstrating the authenticity of a digital message or document.
eOffice user has to get a digital signature (optional) in USB token from any of the certifying authorities like Sify SafeScrypt, e-Mudhra, or (n)Code. For using the DSC token the user has to register the DSC (one time process) using the option DSC Registration under DSC section. To register a new DSC ‘Signing Certificate’ link is used. The registered DSC information will be listed as shown below.
Note: User has to properly install drivers and the Java Packages for the DSC USB Token in the system before registration.
Validating Digital Signature
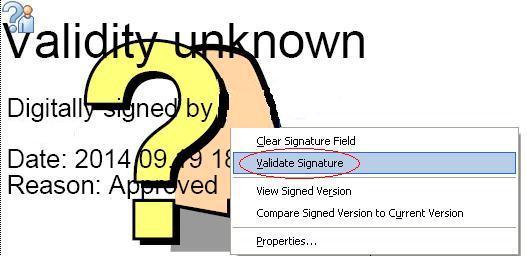
If the Digital Signature is showing as a question mark with unknown validity, right click the signature and Select “Validate Signature” and perform the following steps.
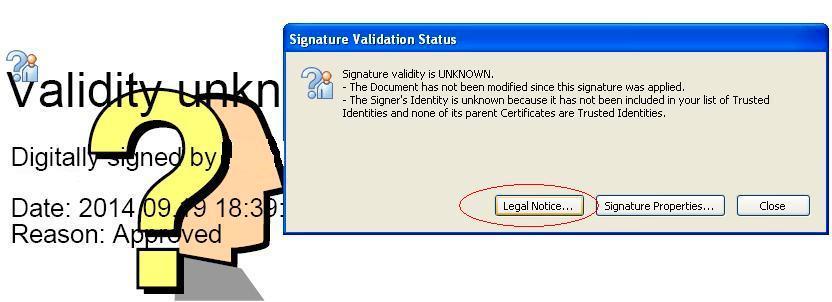
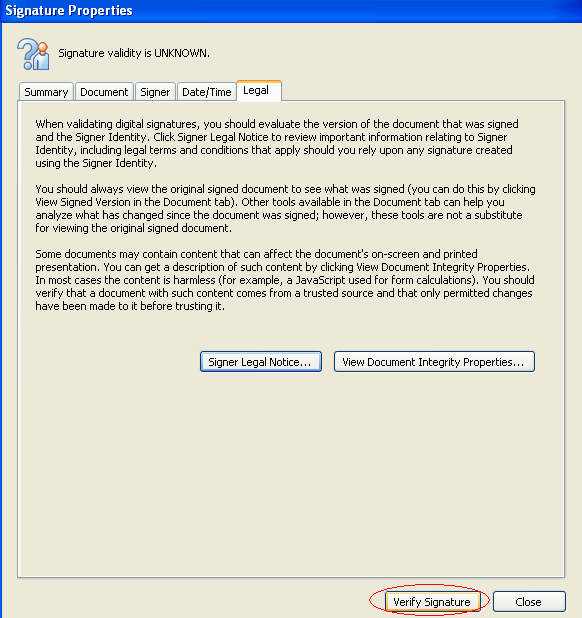
1. Click on ‘Legal Notice’ from the new window
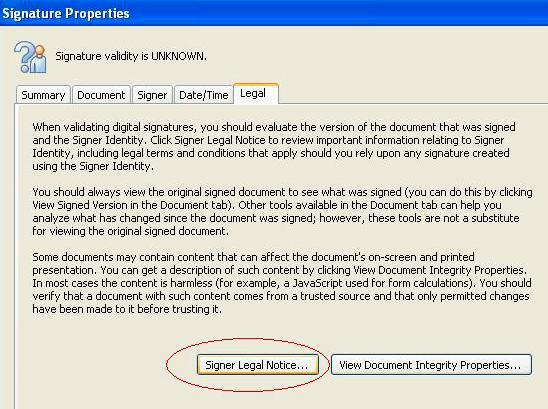
2. Select ‘Signer legal notice’
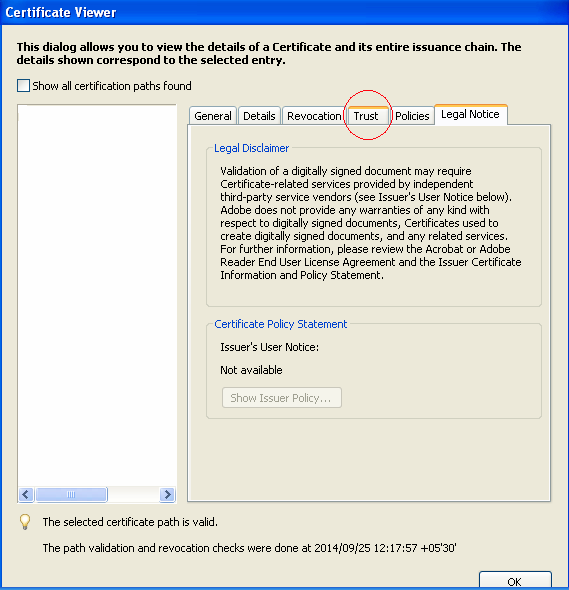
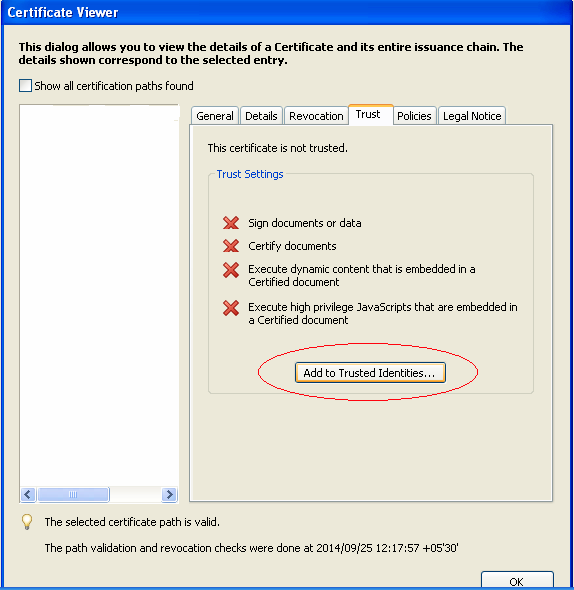
3. Select The tab ‘Trust’
4. Click ‘Add to Trusted Identities’ and press OK
5. Select ‘Verify Signature’
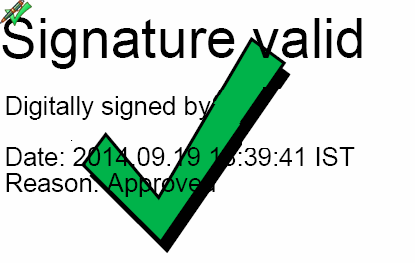
6. Now this signature is Valid
Clearing of Java Cache
Clearing of Java Cache will enable the user to put digital signature without any time delay.
Windows System
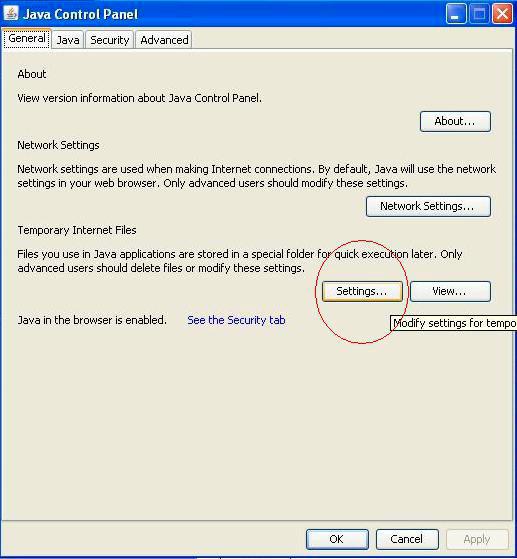
Open Java from the Control Panel Window by performing following steps.
Select Run from the start menu or press Windows key+R on the keyboard. Type “control” command and click OK.
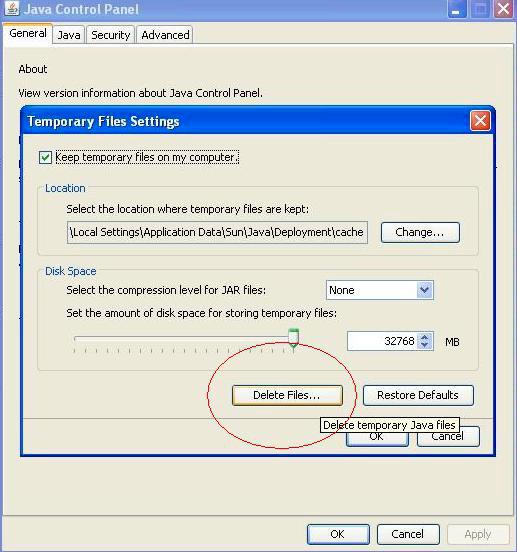
1. Click on settings
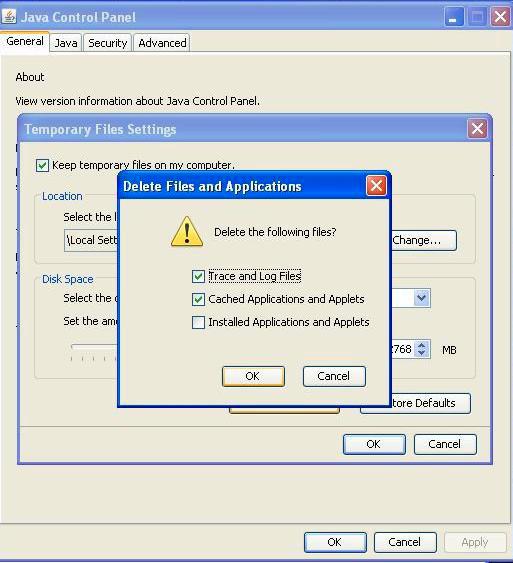
2. Click on Delete files
3. Now press OK
Linux/Ubuntu System
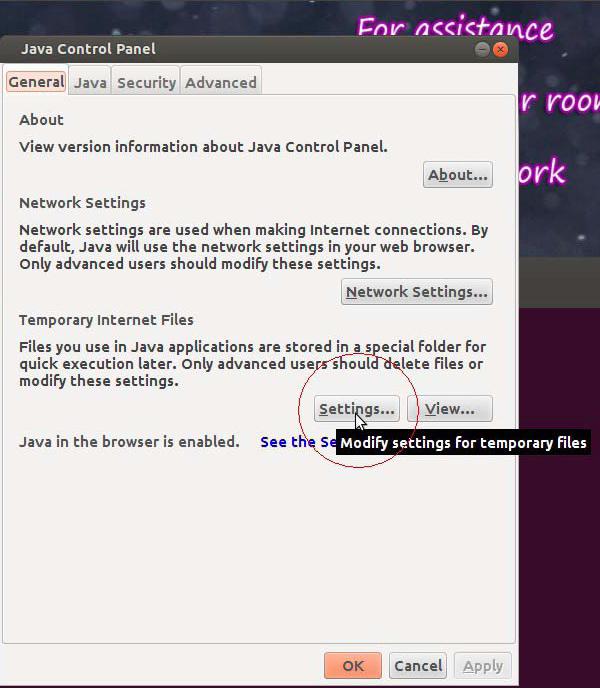
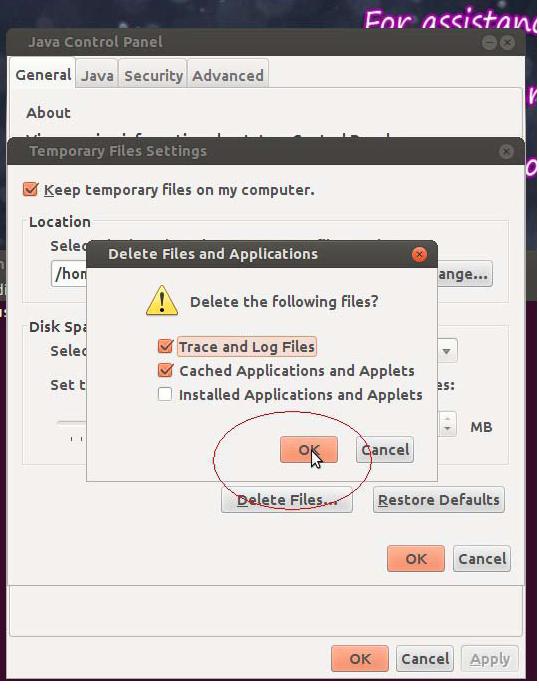
Open the terminal window by pressing alt+Control+T keys together on keyboard then Type the command “jcontrol”. As result, the java control panel window appears. Now click on Settings.
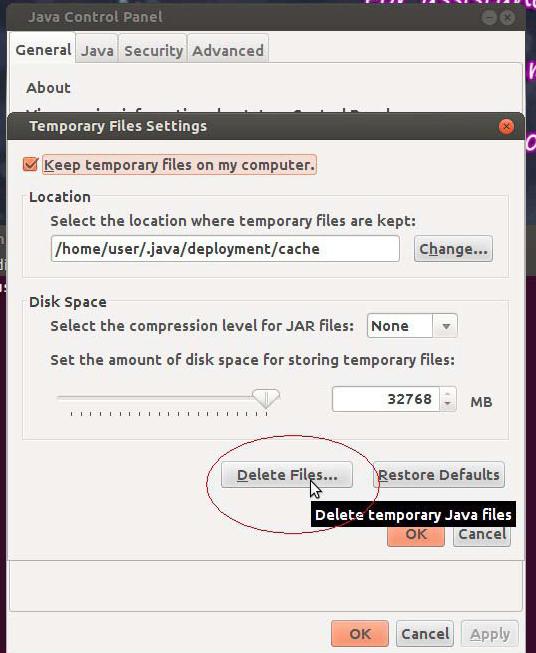
1. Click “Delete Files”
2. Click OK


