eOffice – How to deal with Receipts (Inward Correspondence)
In eFile system, Receipts means the DAK or any Letter received from others or self-generated. In eFile, receipts are created by the CRU (Central Registry Unit ) which is further attached with the file to get processed and approved by the higher authority.
1. Receipts (Tappals/Inwards) registration in eFile
The first process in eFile to register a Receipt is, scan the physically received paper-based receipts into a pdf document and save them in the computer system. Then perform the following steps in the eFile application.
(i) Click the Browse and Diarise option of the Receipts menu, as shown in Figure below.
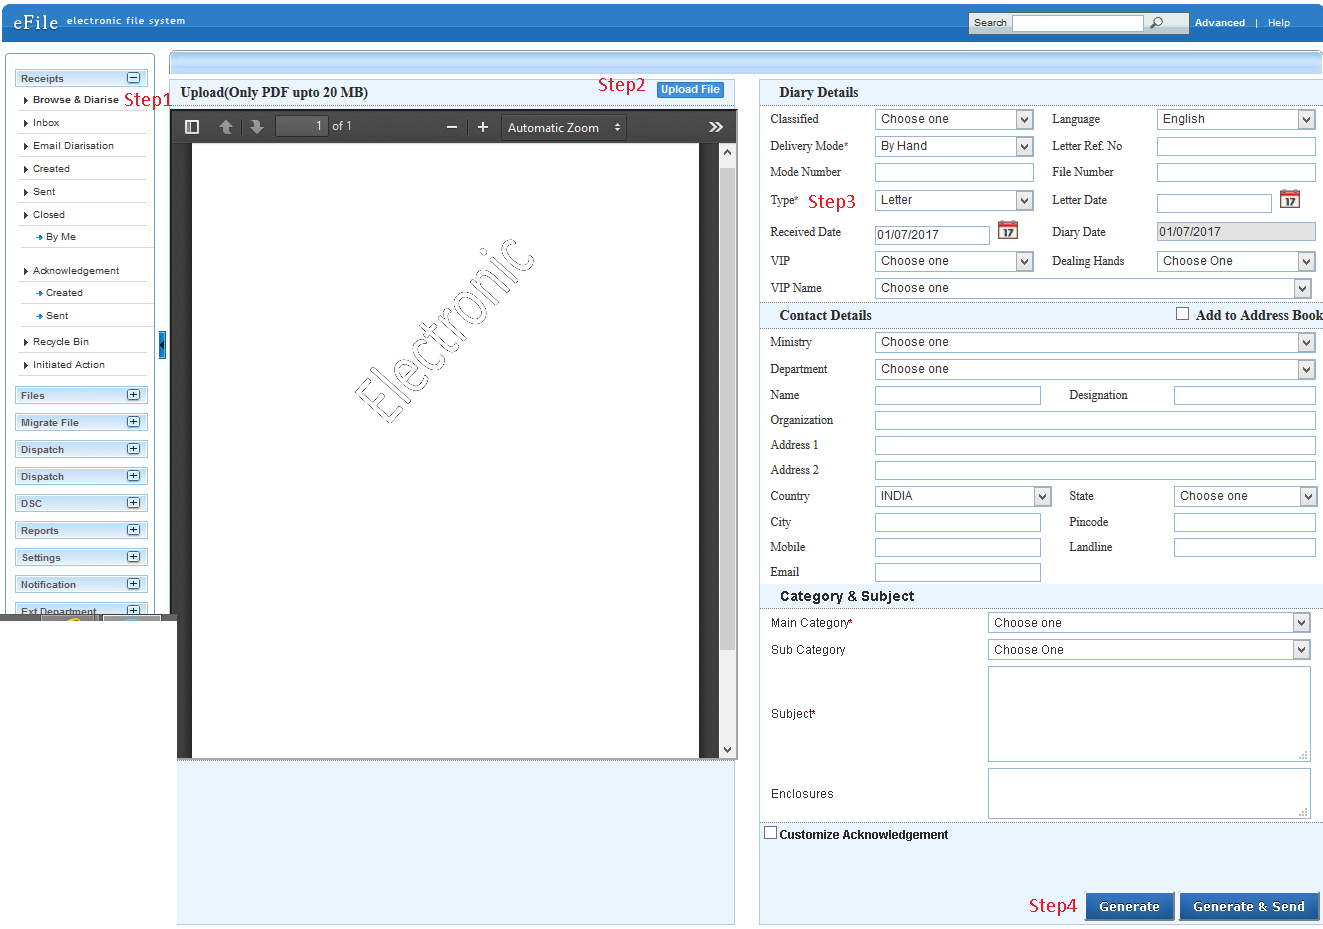
(ii) Click the Upload File button from the Browse and Diarise screen to upload the scanned receipt.
(iii) Enter the essential details in all the mandatory fields in Browse and Diarise Page.
(iv) Click the Generate button on Browse and Diarise page to generate a unique Receipt number.
There are 10 options provided, those are associated with an Electronic receipt created:

- Send → User can use this option to send the generated receipts to other users to work at a later stage.
- Put in File → User can use this option to attach the generated receipt to an existing live file.
- Copy → User can use this option to copy the metadata fields automatically and can edit the metadata fields as per requirement and by uploading a new scanned receipt document the user can generate a new electronic receipt.
- Dispatch → User can use this option to Dispatch the electronic receipt.
- Details → User can use this option to view the details of the generated/received receipts such as Dispatch History, Referenced files, Referenced Receipts, and Detach Receipts.
- Movement → User can use this option to track the Movements of the receipt which automatically gets updated as Receipt moves further.
- Edit → User can use this option to edit the Metadata fields of the Receipt before sending it to the intended recipient.
- Attach Files → User can use this option to attach the receipt with the File.
- Attach Receipts → User can use this option to attach the working receipt/document with the other Receipt(s) irrespective of the receipt nature.
- Generate Acknowledgement → User can use this option to generate an acknowledgment to a created receipt.
2. Sending the Receipt for further action
By clicking on Send option the user can send the generated receipts to other users to work at a later stage. As a result, the following send window appears. By providing the user address in the ‘To’ field (Mandatory) the user can send the receipt for further actions.
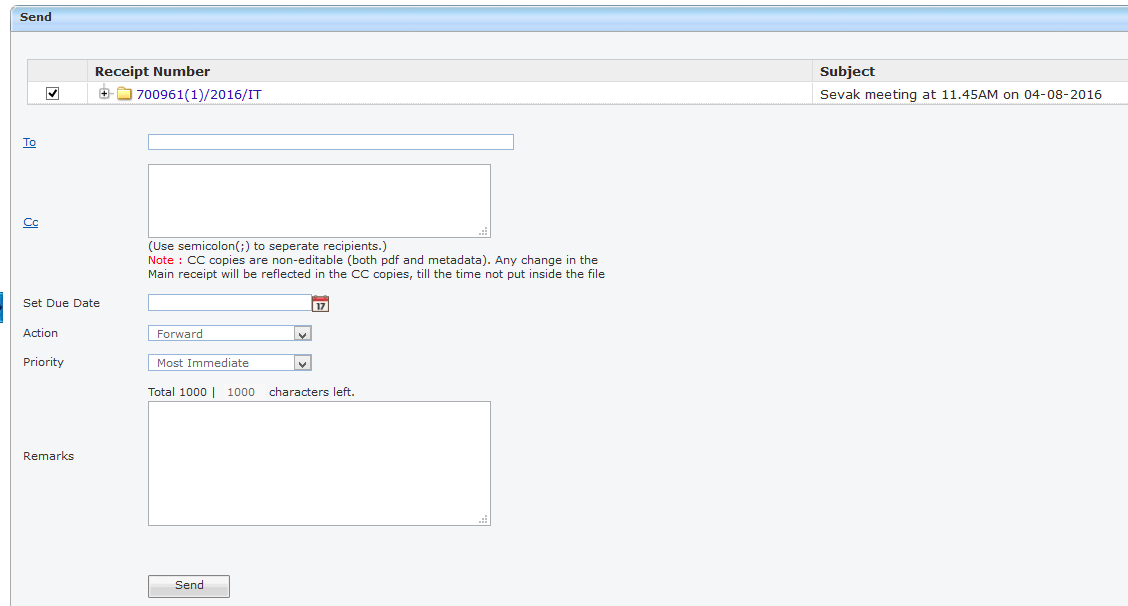
- Cc → Used to send copies of the receipt to different users. Multiple user addresses can be entered by providing semicolons (;).
- Set Due Date → Used to provide a due date indication to the recipient.
- Action → Indication given to the recipient what action has to performed on receipt
- Priority → The user can set the priority to process the receipt. (Immediate, Most Immediate, Out Today)
- Remarks → Remarks can be typed (if required) while sending the receipt.
All the above said entries are optional except the ‘To’ field.
3. Inbox
Inbox option contains the list of all the receipts that are received as an Inward Correspondence. The user has to click the Receipt number to view the receipt. As a result, the user can view the content of the receipt along with the details. Character ‘E‟ symbolizes Electronic Receipt.
There are 12 Links provided under Receipt Inbox:
- Reply → This link helps the user to reply to the sender of the Receipt.
- Close → This link helps the user to close a receipt by providing the closing remarks.
- View Draft → User can use this option to view the drafts that are already created with receipt.
The remaining all other link’s functionalities are the same as already explained under Registration of Receipts.
4. Sent
Sent option contains a list of all the receipts that are sent as outward correspondence.
User can view all the sent receipts, by clicking the Sent link under the Receipts section. As a result, the Sent Receipts screen appears as shown in Fig.eFile.3. There are 4 links provided under Sent Section of receipt:
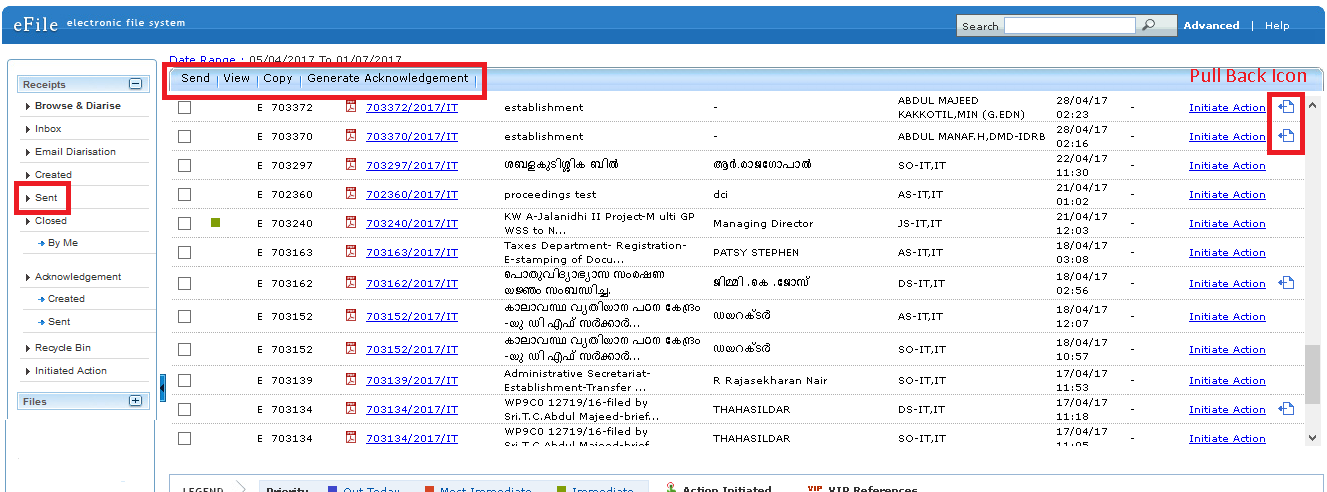
View → User can use this option to list the Files depending upon their current state. i.e. (Electronic, VIP References, All)
User can also Pull back the sent receipt from the intended recipient even when the receipt is in the Inbox of the recipient, using the Pull Back link. In case, the recipient has opened the receipt, then pullback option is inaccessible.
5. Closed
Closed option contains a list of all the receipts that are marked as closed. User can re-open the closed receipt anytime by clicking the Re-Open option.
To Re-open any Receipt user has to perform following steps:
Select the Closed receipt which needs to be Re-Open and click the Re-open option available, as shown in Fig.eFile.9. As a result, a confirm message to re-open the receipt will appear. The re-opened receipts will be moved to the inbox by clicking on the OK button of the confirmation message.

📢 Stay Updated with GConnect
Join our Whatsapp channels for the latest news and job updates:
Join GConnect News Join GConnect Jobs
GConnect News

GConnect Jobs